Maybe your PC won't boot. Or it could be infected with some kind of persistent malware. Perhaps Windows puts up a Blue Screen of Death every time you type the word aardvark.
No matter what kind of trouble your computer is having, someone will probably tell you to reformat your hard drive, reinstall Windows and your applications, and then restore your documents, photos, and music from a backup.
That isn't always good advice--according to a 2004 Salon.com article, incompetent tech support people use it to get customers off the phone. But if nothing else fixes a problem that's impossible to live with, starting over from scratch may be the best solution.
Don't do it unless you've tried everything else, however. If your PC refuses to boot, see "Six Downloadable Boot Discs That Could Save Your PC" for better options. If Windows boots and then horribly misbehaves, check for malware, remove unneeded autoloaders, and update drivers. You might even consider cleaning the Registry.
If after all that you determine that you must wipe out and reinstall Windows, follow these seven steps to make the process as safe and painless as possible.
Step 1: Find and Know Your Restore Tool
You need some sort of bootable environment that can restore or reinstall Windows--and you probably have one. PCs that ship with Windows all come with one of the following options.
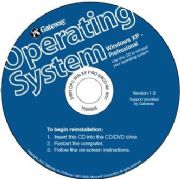
 A restore disc is a bootable CD or DVD that can restore your hard drive to the exact contents it had when the PC left the factory. In most cases the recovery disc will destroy all of your data--documents, photos, and so on--while "saving" your system. Some manufacturers don't actually ship a separate restore disc with your PC, but instead install software on the hard drive that you can use to create your own restore discs. If your PC came with a restore disc, but you can't locate it, see "How Do I Restore Windows If I've Lost My Restore CD?"
A restore partition lies hidden on the hard drive. You access it by pressing a particular key combination at boot time. Check your documentation to learn whether you have one and how to access it. The partition does the same thing as a restore disc does.
An actual Microsoft Windows CD or DVD is the best tool of them all, but unless you bought an upgrade to a newer version of Windows, you probably don't have one.
Step 2: Gather Everything Else You Need
Make sure you have all of the following before you take any action.
A driver backup: See "How Do I Back Up My Drivers?" for instructions.
Backup media and software: You'll want an external hard drive (or better yet, two of them), some blank DVDs, and backup software. I'll cover more details in Steps 3 and 4.
Your applications: For every program you use that didn't come with your PC, you need the CDs they came on, their serial numbers, their registration codes, and so on. If you downloaded an application, make a backup of the download file or check to be sure that you can easily download it again.
Time: In reality, this project will probably take only a few hours, but you want to leave yourself a day of wiggle room in the event that you can't locate an important driver or software disc. This project is best tackled at the start of a long holiday, or at least over a weekend, to avoid disrupting your business if something goes wrong.
A good book or some other diversion: You're going to spend a chunk of time in front of a nonworking PC. If the PC is a laptop, plop it down on the coffee table so that you can watch a little TV while the installers are running.Step 3: Create an Image Backup of Your Hard Drive
In the unlikely event that something goes wrong (for instance, you forget to save a copy of an important presentation that you need for work on Monday), an image backup of your hard drive in its current state will let you quickly and easily restore everything to where it was before you started. Resist the temptation to skip this step, as it's your most reliable safety net.
What should you back up to? An external hard drive--they're fast, cheap, and easy to work with. For best results, pick one that's at least twice the size of all the data you have. If your 160GB hard drive has 90GB of data on it, a 200GB external drive will make a good choice. With 500GB and 1TB drives now readily available and reasonably priced, though, I suggest you go as big as you can afford; that way you can save more than one copy of your files to the drive, or even use it to back up multiple PCs.
And what software should you use? Ghost and TrueImage are the two best-known image-backup programs, but they aren't the only ones. Check your regular backup program (you do back up regularly, don't you?) for an image-backup feature, quite likely labeled Disaster Recovery. The backup software that came with your external drive might have something similar, too.
 Vista Business and Ultimate have built-in image backup. Click Start, type backup, select Backup Status and Configuration, and press Enter. Click Complete PC Backup, and then choose Create a backup now.
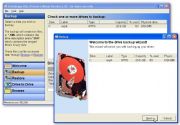
And, as usual, you have free options. I recommend Runtime Software's DriveImage XML.
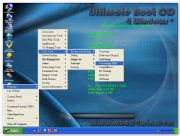
Remember, though, that an image backup is useless if you can't boot from a CD or DVD to restore it. Both Ghost and TrueImage come with tools for creating just such a disc. If you opt to use Vista's Backup tool, make sure you have either a true Windows Vista DVD or the Vista Recovery Disc available for recovery purposes. You can recover a DriveImage XML backup via the Ultimate Boot CD for Windows.
Step 4: Make a Data Backup
Yes, I just had you create a backup of everything on your hard drive, including your data. But the purpose of that first backup was to add an extra layer of security. This second, data-only backup will make restoring your data, once you reinstall Windows, easier.
See "What's the Best Way to Back Up What I Need to Back Up?" for two lists (for XP and Vista) of Windows' data-holding folders. But don't worry about the software I recommend in that article--all you need to do right now is drag and copy those folders to a safe location.
As for what location, once again, an external hard drive does well. If you're really paranoid (as I am), you'll use a different external drive than you used for your image backup; it's safer than putting all your backups onto one hard drive. If you have only a few gigabytes of data files, burning them to DVD is a good, cheap solution.
Step 5: Reformat, Restore, and Recover
Now comes the main event. I can't really give you specific instructions for using your recovery tool, because I don't know what recovery tool you have. Just boot into it and follow the prompts. They're all designed to be as simple as possible.
Step 6: Make Windows Your Own
Congratulations. You now have a new version of Windows, configured exactly the way Microsoft and/or your system vendor like it (or, the way they liked it at the time you bought your PC).
Now you have to configure it, remove any preinstalled junk, install your own software, and generally make it yours all over again. This is, in my opinion, the longest and most annoying part of the job, and in Step 7 I'll tell you how to avoid it in the future. But for now, do the following.
a. In Control Panel's Users applet, create log-ons for yourself and any other users. You will need to have at least one Administrator-level user.
b. Remove bundled programs you don't want. I recommend the portable version of Revo Uninstaller for this job.
c. Restore your backed-up drivers. You can probably skip the drivers for anything that came with your PC, as your restore tool likely creates a version of Windows already set up with them.
d. Download and install any Windows updates.
e. Starting with your security software, install programs you use that didn't come with the PC. Update them, and then configure them to your liking.
f. Rearrange the Start menu as you wish.
g. Select your preferred wallpaper, screen saver, power settings, and so on.
Step 7: Create Another Image Backup
No, I'm not kidding. This step isn't strictly necessary, but if you ever need to restore Windows to this computer again, you can simply back up your personal data, restore this fresh and clean image backup, and then put your data back in its place.
Remember, the restore tool restores Microsoft's and your vendor's configuration of Windows, not yours. Think of this image as your own, customized restore tool, allowing you to skip Step 6 the next time around.
Because you have not yet copied your data back to the hard drive, this image will be relatively small. Put it on a series of writeable DVDs rather than an external drive, label them clearly with today's date, and safely store them away.
Step 8: The Final Touch
With Windows ready and recoverable, restore your data from the data backup with a few simple drags and drops. In the unlikely event that that backup has been damaged, restore it from the image backup. And keep both backups around for a month or so, just in case you missed an important file.
Finally, sigh, relax, treat yourself to something decadent, and get on with your life.

No comments:
Post a Comment